Table of Contents
Installing an electrical box in a completed wall may appear to be a complicated process. But don’t worry! It is doable with the correct equipment and instructions. This post goes over the equipment and materials you need, as well as a step-by-step description of how to install an electrical box in a completed wall.
By following these steps, you can install electrical components to your wall safely and effectively without causing any damage or injury.
However, before starting, it’s vital to understand that only a skilled person should perform electrical work. If you are unsure about any element of the installation, seek the aid of a licensed electrician.
Stuff You Need for Installing an Electrical Box in a Finished Wall
Let’s make sure you have all the necessary tools and materials at hand. Here’s a checklist:
- Stud Finder: To locate the studs behind the finished wall.
- Screws: For securing the electrical box to the wall.
- Utility knife: To mark and cut the wall.
- Screwdriver: For attaching cover plates and securing the box.
- Electrical Tape: To insulate wire connections.
- Drill: If you need to create holes for cable clamps.
- Drywall Saw/Rotary Cutter/Jigsaw: For making precise cutouts in the wall.
- Cable Clamps: To secure the electrical wiring.
- Remodel Boxes Acceptable Under Local Code: Ensure you comply with local regulations.
- Pencil or Marker: For marking lines on the wall.
Process of Electrical Box Installation in a Finished Wall
Now that you have everything you need, let’s move on to the step-by-step instructions:
1. Select the Perfect Location
Start by determining the ideal location for your electrical box. Consider the proximity to other outlets or switches, check if it is a safe place, and ensure it meets safety guidelines.
2. Trace Out the Box
- Tape the Box to the Wall Backwards: Position the electrical box against the wall, but tape it in a backward orientation. This allows you to mark the outline without the box obstructing your view.
- Mark the Lines: Using a pencil or marker, mark the box’s horizontal and vertical lines on the wall.
- Connect Them and Form an Outline for a Cutout: Connect the marked lines to form an outline for the cutout. This step serves as your guide when cutting the wall.
3. Make a Precise Box Cutout With a Jab Saw
Using a jab saw or an appropriate cutting tool, carefully cut along the marked outline. Take your time and ensure clean and accurate cuts.
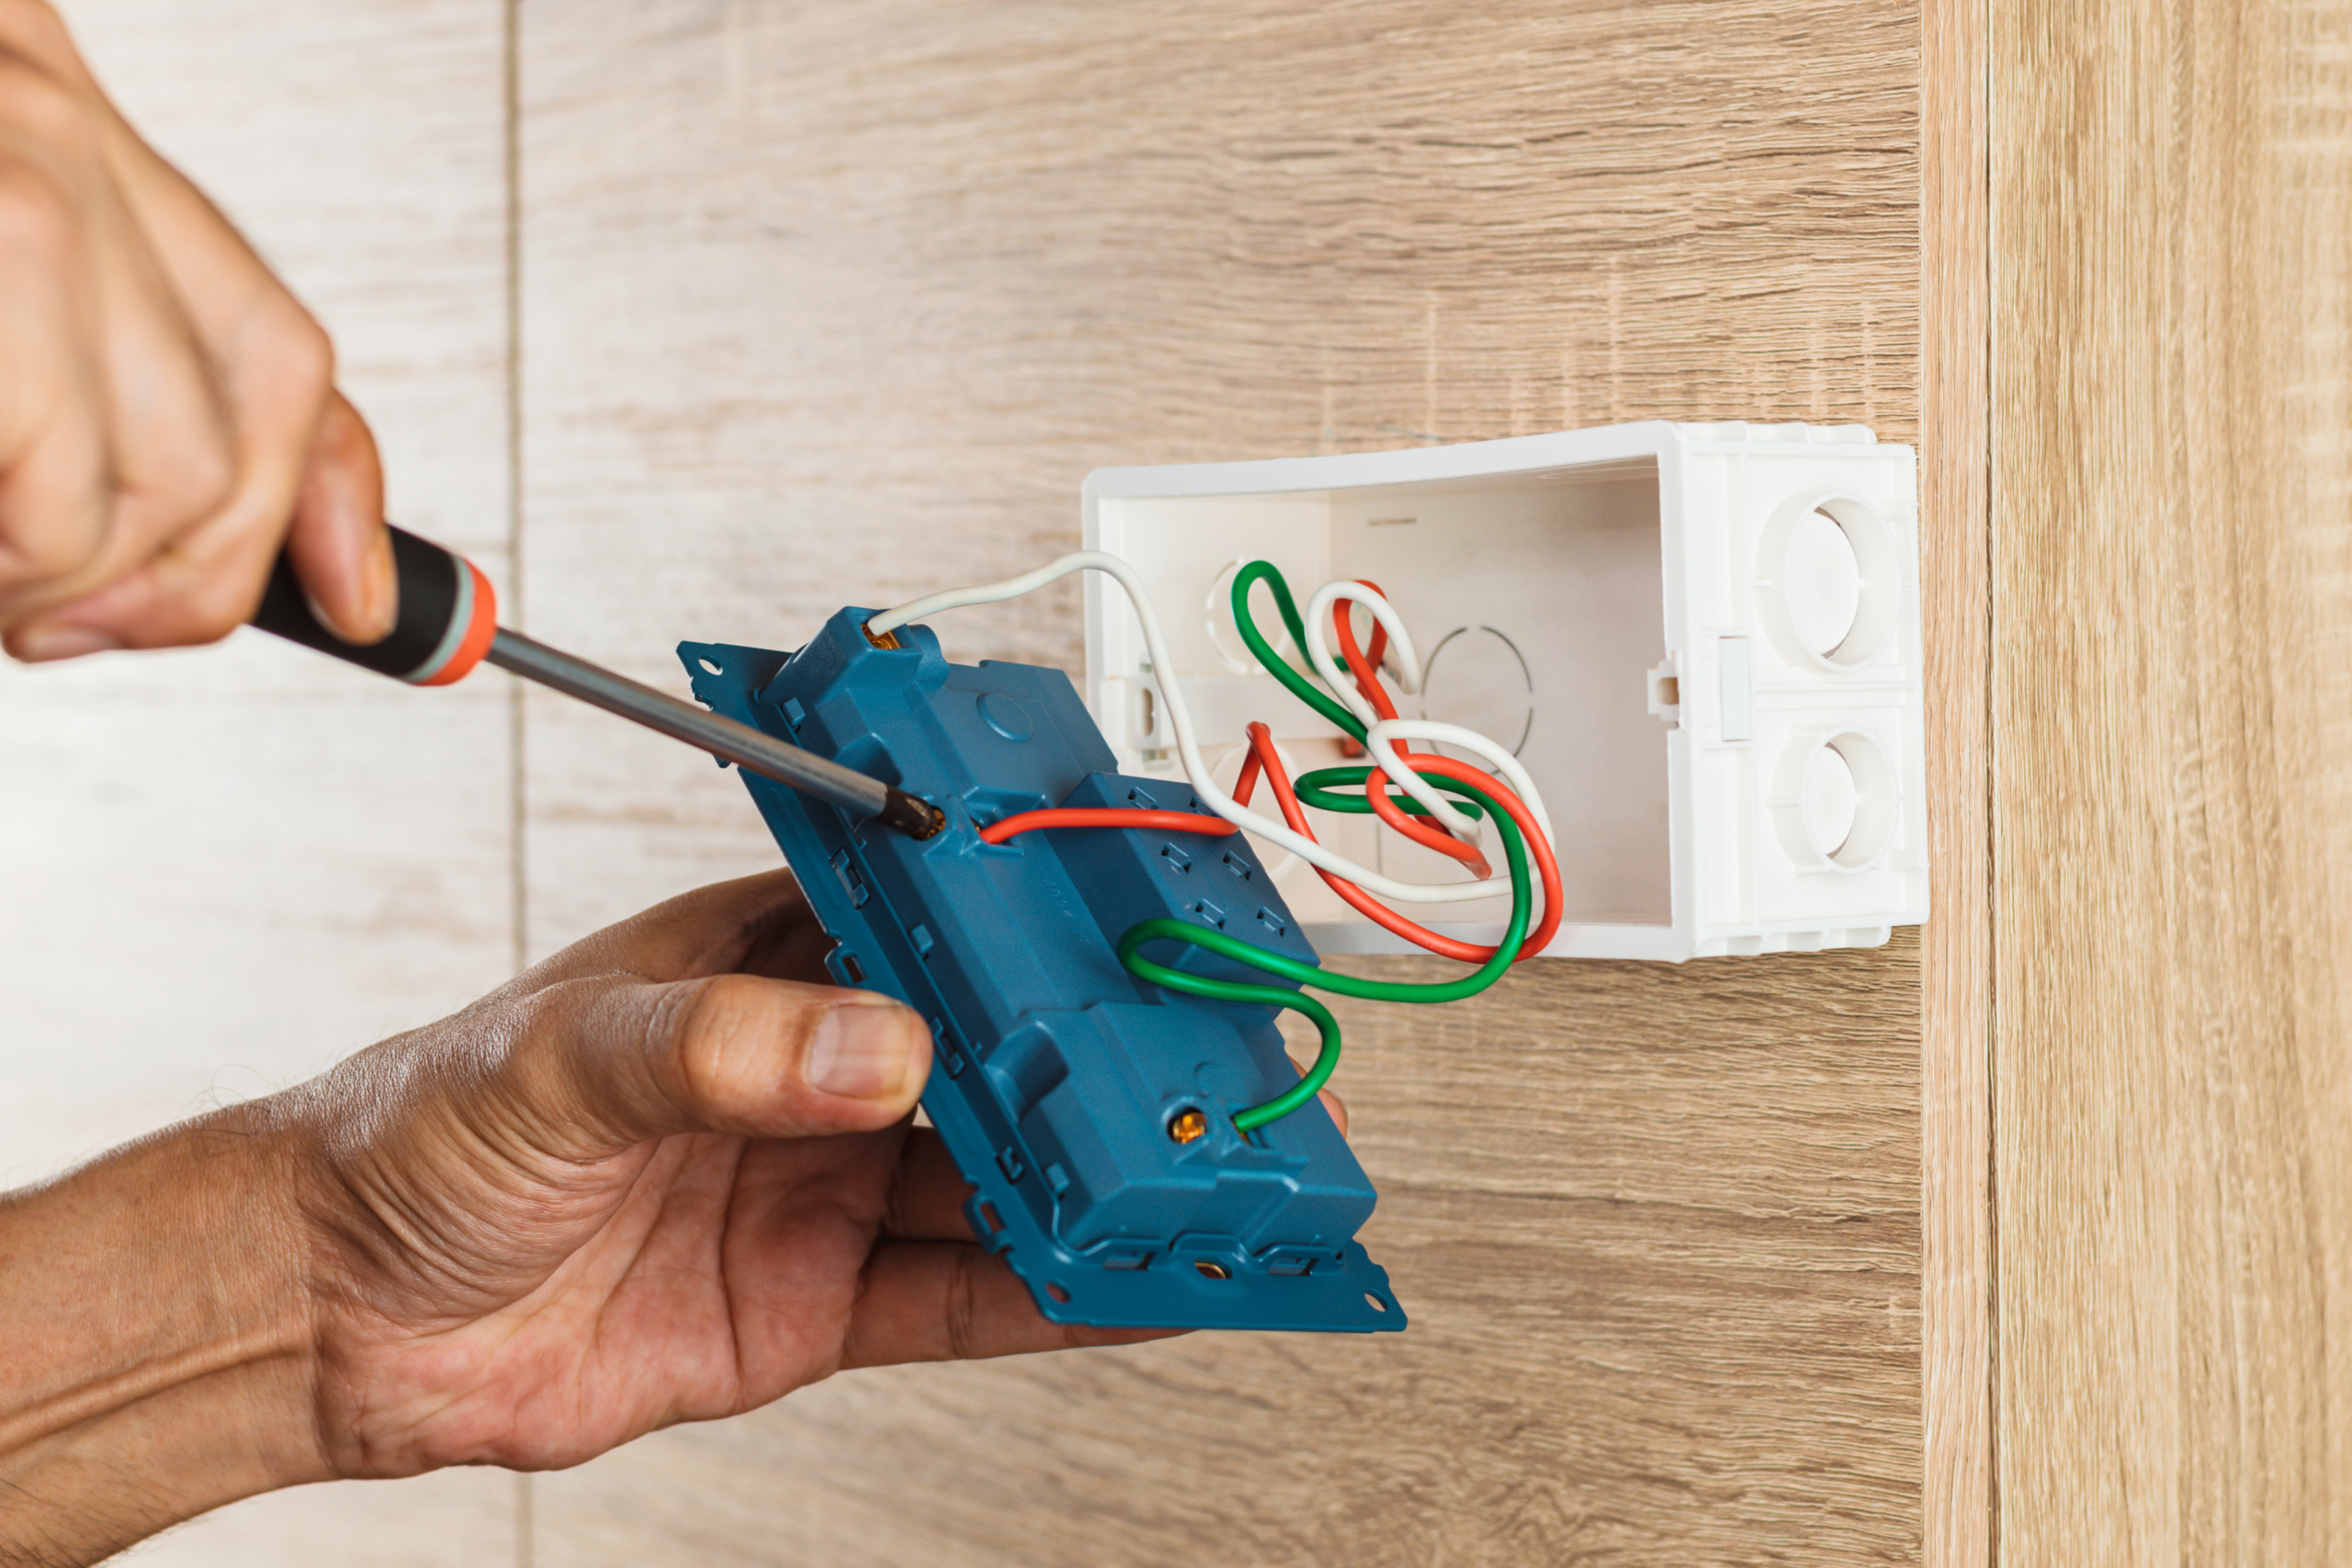
4. Prepare the Electrical Box
- Inspect the Box: Check the box for any damages or defects before proceeding.
- Remove knockout Tabs: If necessary, remove any knockout tabs in the box to accommodate the wiring.
- Secure the Box: Securely attach the electrical box to the wall using screws or other suitable fasteners.
- Organize the Wiring: Neatly organize the wiring inside the box, ensuring there are no loose or exposed wires.
- Attach Cover Plates: Finish off the electrical box installation by attaching the appropriate cover plates to the electrical box.
5. Run Electrical Wiring
- Switch the Power Off: Before working with electricity, always turn off the power supply at the main breaker.
- Choose the Path: Plan the path for the electrical wiring, ensuring it meets electrical code requirements.
- Measure the Wire and Cut Accordingly: Measure and cut the electrical wire to the appropriate length for the installation.
- Strip and Thread the Wire: Using a wire stripper, carefully strip off the insulation from the wire ends and thread them through the appropriate openings in the electrical box.
- Secure and Connect Them: Secure the electrical wiring in place and connect them to the appropriate terminals inside the box. Use cable clamps for this task if required.
6. Attach the Electrical Box to the Wall
Now is the time to install an electrical box. Once the wiring is in place, firmly attach the electrical box to the wall using screws or other suitable fasteners. Ensure it is securely fixed and leveled.
7. Connect the Wiring and Test the Connections
Double-check all the wire connections inside the electrical box, ensuring they are adequately secured. Once done, you can turn on the power and test the connections with a voltage tester to ensure everything is working correctly.
8. Close the Opening in the Wall
If you had to make a larger cutout in the wall, use drywall to install an electric box. You can also use plaster repair techniques to close the opening. This leaves your wall looking seamless and professionally finished.
What if the Wall is Made of Plaster?
When dealing with a plaster wall, the procedure is much the same. To avoid harming the wall, be highly cautious when cutting through the plaster. To create clean and accurate cuts, you may also require specialized instruments, such as a plaster saw.
To conclude, installing an electrical box in a completed wall involves meticulous design and attention to detail. You may confidently undertake this project and improve the functioning of your living area by following the step-by-step directions described in this tutorial.
Remember, always prioritize safety and follow all local electrical rules. Best wishes for your installation!