
Table of Contents
When people buy an old house, they concentrate primarily on its beautification. But the electrical renovation of an old house is more crucial from the safety point of view. That is why we will cover how to securely add a ground wire to an old house.
The appliances used today are heavy-duty and advanced. They draw more current and generate more heat than older devices were designed to handle. That is why you need to replace 2-prong receptacles with 3-prong GFCI receptacles and complete the work of electrical grounding.
You might also need to add a grounded wire in some newer houses if the receptacles are not grounded properly.
Why Grounding Matters in Older Homes
Older homes built before the 1960s typically used a two-wire system with only a hot wire and a neutral wire. There was no dedicated ground wire. Without a ground path, excess electrical current has nowhere safe to go during a fault, which increases the risk of electric shock, fires, and damage to sensitive electronics.
Modern appliances, computers, and medical devices rely on a proper ground to function safely. Replacing or upgrading your wiring is one of the most valuable investments you can make in an older home.
Methods to Ground an Old House
There is no single solution that works for every home. Here are the four most common and code-compliant methods, so you can choose the right approach for your situation.
Method 1: Run a New Ground Wire to the Panel
This is the most thorough and permanent fix. You fish a new green or bare copper ground wire from each receptacle back to the main electrical panel. Use 12-gauge wire for 20-amp circuits and 10-gauge wire for 30-amp circuits. This method meets the National Electrical Code (NEC) fully and provides the highest level of protection for your appliances and devices.
Method 2: Use Metal Conduit as a Ground Path
Many older homes were wired using metal conduit (also called rigid metal conduit or EMT). If the conduit runs continuously and without breaks from the outlet box back to the panel, it can serve as a valid grounding path. Test for continuity using a multimeter before relying on this method. If continuity is confirmed, you can install a 3-prong outlet and connect the ground terminal to the metal box.
Method 3: Install GFCI Outlets (No Ground Wire Required)
Under NEC Section 406.4(D)(2), you are permitted to replace an ungrounded 2-prong receptacle with a GFCI receptacle even without adding a ground wire. The GFCI monitors current flow and trips instantly if it detects an imbalance, protecting against shock. However, this method does not protect sensitive electronics from damage caused by electrical surges. You must label these outlets with a sticker that reads “No Equipment Ground,” which is typically included with the GFCI outlet. This is a practical, lower-cost option when running new wire is not feasible.
Method 4: Extend a Ground from an Existing Grounded Circuit
If one outlet in a room is already grounded, you can run a new ground wire from that outlet to nearby ungrounded outlets in the same branch circuit. This is permitted under the NEC as long as the wire is properly sized and connected. It is a good middle-ground option when only a few outlets in an area are ungrounded.
Estimated Cost of Grounding an Old House
The cost of retrofitting electrical grounding varies based on the method you choose and the size of your home. Here is a general breakdown:
- GFCI outlet replacement (DIY): $15 to $50 per outlet for parts
- GFCI outlet replacement (professional): $100 to $200 per outlet including labor
- Running new ground wire per circuit: $100 to $300 per circuit depending on accessibility
- Whole-house grounding retrofit: $1,500 to $5,000 or more depending on home size and wiring complexity
On average, homeowners spend between $200 and $500 for a partial grounding upgrade covering a handful of circuits. Always get multiple quotes from licensed electricians before committing to a full-house rewire.
Tools and Materials You Will Need
- Non-contact voltage tester
- Circuit tester or outlet tester
- Flat-head and Phillips screwdrivers
- Wire stripper
- Needle-nose pliers
- Green grounding screws
- Electrical tape
- GFCI receptacle or 3-prong grounded receptacle
- Bare copper or green-insulated ground wire (12-gauge for 20A circuits, 10-gauge for 30A circuits)
How to Add a Ground Wire to an Outlet: Step-by-Step
The steps below walk you through replacing an ungrounded outlet with a GFCI receptacle or a grounded 3-prong receptacle. This is the most common DIY approach.
Step 1: Take All Mandatory Approvals

Before starting any residential electrical work, check with your local building authority. Most jurisdictions require a permit for electrical upgrades, even simple ones. National and local electrical codes govern everything from how high GFCI outlets must be mounted (typically within 5 feet of the floor in bathrooms) to whether outdoor receptacles must be weather-resistant and tamper-resistant. Skipping permits can create issues when selling your home and may void your homeowner’s insurance. Start your work only after reviewing the requirements of your local electrical codes in detail.
Step 2: Get a Circuit Tester

A circuit tester is a non-negotiable tool when adding a ground wire to a receptacle. You can find it and other tools like screwdrivers at any local home repair store. A circuit tester can detect several possible issues in a receptacle including whether an outlet is grounded, whether wiring is reversed, and whether there is an open ground or open neutral. Some advanced tester models can also test GFCI receptacles for proper tripping. Always verify your tester is working before testing any outlets.
Step 3: Examine the Receptacle with the Circuit Tester

Plug the circuit tester into each receptacle or outlet in your home. Check the indicator light pattern and compare it to the tester’s legend. Mark the outlets that show a grounding issue with tape so you can return to them. The tester has three prongs corresponding to the hot, neutral, and ground terminals. If the tester shows an open ground, that outlet is ungrounded and needs attention.
Step 4: Turn Off the Main Power
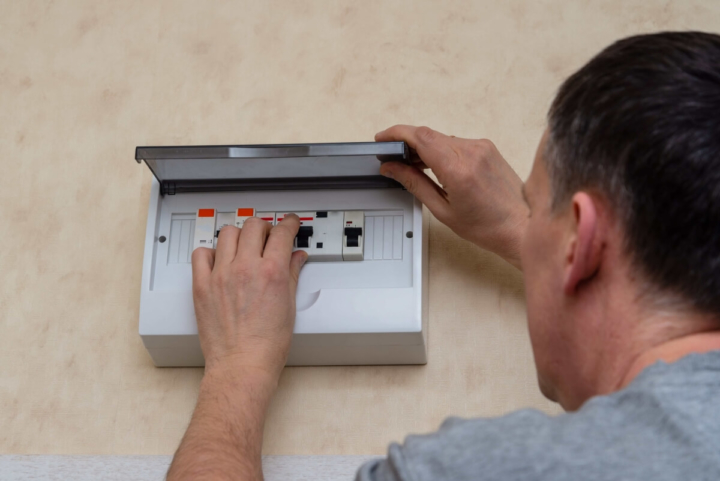
Switch off the power at the circuit breaker before you start any work. You can turn off just the circuit breaker for the specific room if you prefer to leave other areas powered. In that case, confirm with your non-contact voltage tester that the power is off at every outlet you plan to work on. Turning off the power for the whole house is the safest option if you are unsure which breaker controls which outlets.
Step 5: Remove the Cover Plate
After confirming the power is off, remove the cover plate with a screwdriver. Take care around any wallpaper or painted surfaces near the outlet. Pulling too hard can tear the wallpaper or chip the paint. Once the cover plate is off, set it aside safely.
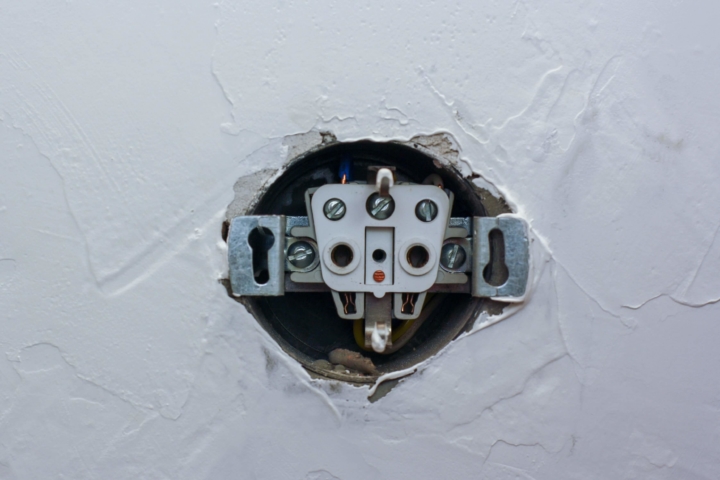
Step 6: Remove and Inspect the Receptacle

Pull the receptacle out of the box as far as the attached wires allow. Look carefully at the wires inside. In a properly grounded 3-prong receptacle, you will find three wires: a black (hot) wire, a white (neutral) wire, and a bare copper or green (ground) wire. If you see only black and white wires with no ground wire at all, the circuit is ungrounded and you will need to choose one of the methods described above to add grounding. If there is a ground wire but it is loose, simply tighten it and reinstall the receptacle.
Step 7: Connect the Wires to the New Receptacle
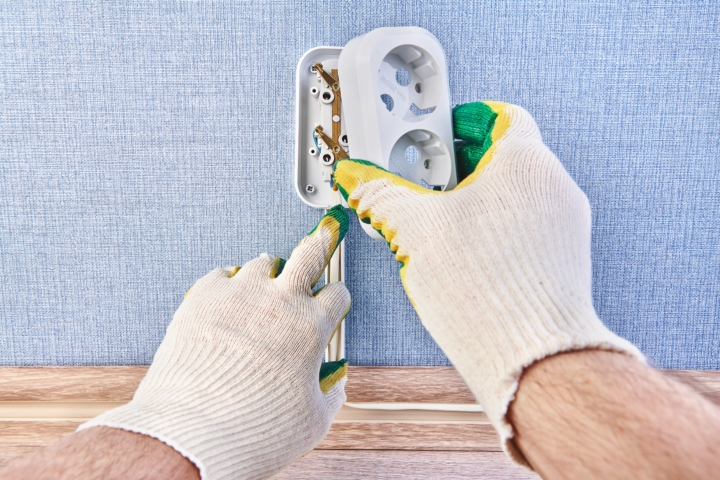
If you are installing a new grounded or GFCI receptacle, connect the wires as follows:
- Connect the black (hot) wire to the brass (gold) terminal.
- Connect the white (neutral) wire to the silver terminal.
- Connect the bare copper or green ground wire to the green grounding screw on the receptacle.
If you are installing a GFCI receptacle, use the terminals labeled “LINE” for the incoming wires. Do not use the “LOAD” terminals unless you intend to protect additional downstream outlets. Wrap the terminals and wire connections with electrical tape once everything is secure. Carefully fold the wires back into the box and push the receptacle in, making sure no wires are pinched. Finally, mount the cover plate and tighten the screw securely.
Important note for GFCI-only installs: If there is no ground wire in the box and you are relying solely on the GFCI for protection, you must attach the included “No Equipment Ground” label sticker to the outlet face. This is a code requirement under NEC 406.4(D)(2).
Step 8: Turn the Power Back On and Test

Restore power at the circuit breaker and use your circuit tester to confirm each outlet is wired correctly. If you installed a GFCI outlet, press the “Test” button to confirm it trips and the “Reset” button to restore power. All indicator lights on your tester should now show a properly functioning outlet.
When to Hire a Licensed Electrician
Working with electricity carries real risks, including shock, fire, and serious injury. You should hire a licensed electrician if any of the following apply:
- Your home still has knob-and-tube wiring or aluminum wiring throughout
- You are not comfortable identifying wire types or working inside an electrical panel
- Your home requires a full rewire rather than outlet-by-outlet upgrades
- Your local code requires inspections that must be performed by a licensed professional
- You are adding grounding to a large number of circuits throughout the home
A licensed electrician can also assess whether your electrical panel itself needs an upgrade to safely handle modern loads, which is a separate but equally important concern in older homes.
Frequently Asked Questions
Can I use a GFCI outlet without a ground wire?
Yes. The NEC permits replacing an ungrounded 2-prong outlet with a GFCI outlet without running a new ground wire. You must label the outlet “No Equipment Ground.” The GFCI will protect people from shock but will not protect sensitive electronics from surges the way a true ground wire does.
What wire gauge should I use for a ground wire?
Use 12-gauge wire for 20-amp circuits and 10-gauge wire for 30-amp circuits. For standard 15-amp circuits, 14-gauge wire is acceptable. Always match the gauge of the existing circuit wiring.
Is it safe to have ungrounded outlets in an old house?
Ungrounded outlets are a safety risk, especially with modern appliances. They increase the chance of electric shock and can damage electronics. Replacing them with GFCI outlets is a code-compliant minimum, but running a true ground wire is always the preferred solution.
Do I need a permit to add a ground wire?
In most jurisdictions, yes. Even replacing outlets typically requires a permit and inspection. Check with your local building department before starting work.


