
Table of Contents
A multimeter is a great tool to have on hand if you’re working with electrical components, as it can help you troubleshoot and identify problems. It’s easy to use and can give you a lot of helpful information in just a few seconds.
Plus, it’s an affordable piece of equipment that can be found in most stores of electrical materials. So if you’re into electronics, it’s definitely worth picking up a multimeter!
What is a Multimeter?
A multimeter is a tool used to measure the three essential electrical parameters of voltage, current, and resistance. It can also be used to check the continuity between two points in an electrical circuit. This post focuses on introducing the basics of its uses, applications, types, and average price.
What are the Different Types of Multimeters?
When it comes to multimeters, having the right one for the job can make all the difference. Understanding the different types of multimeters and which is best for you can help you. The types of multimeter are:
-
- Analog Multimeters
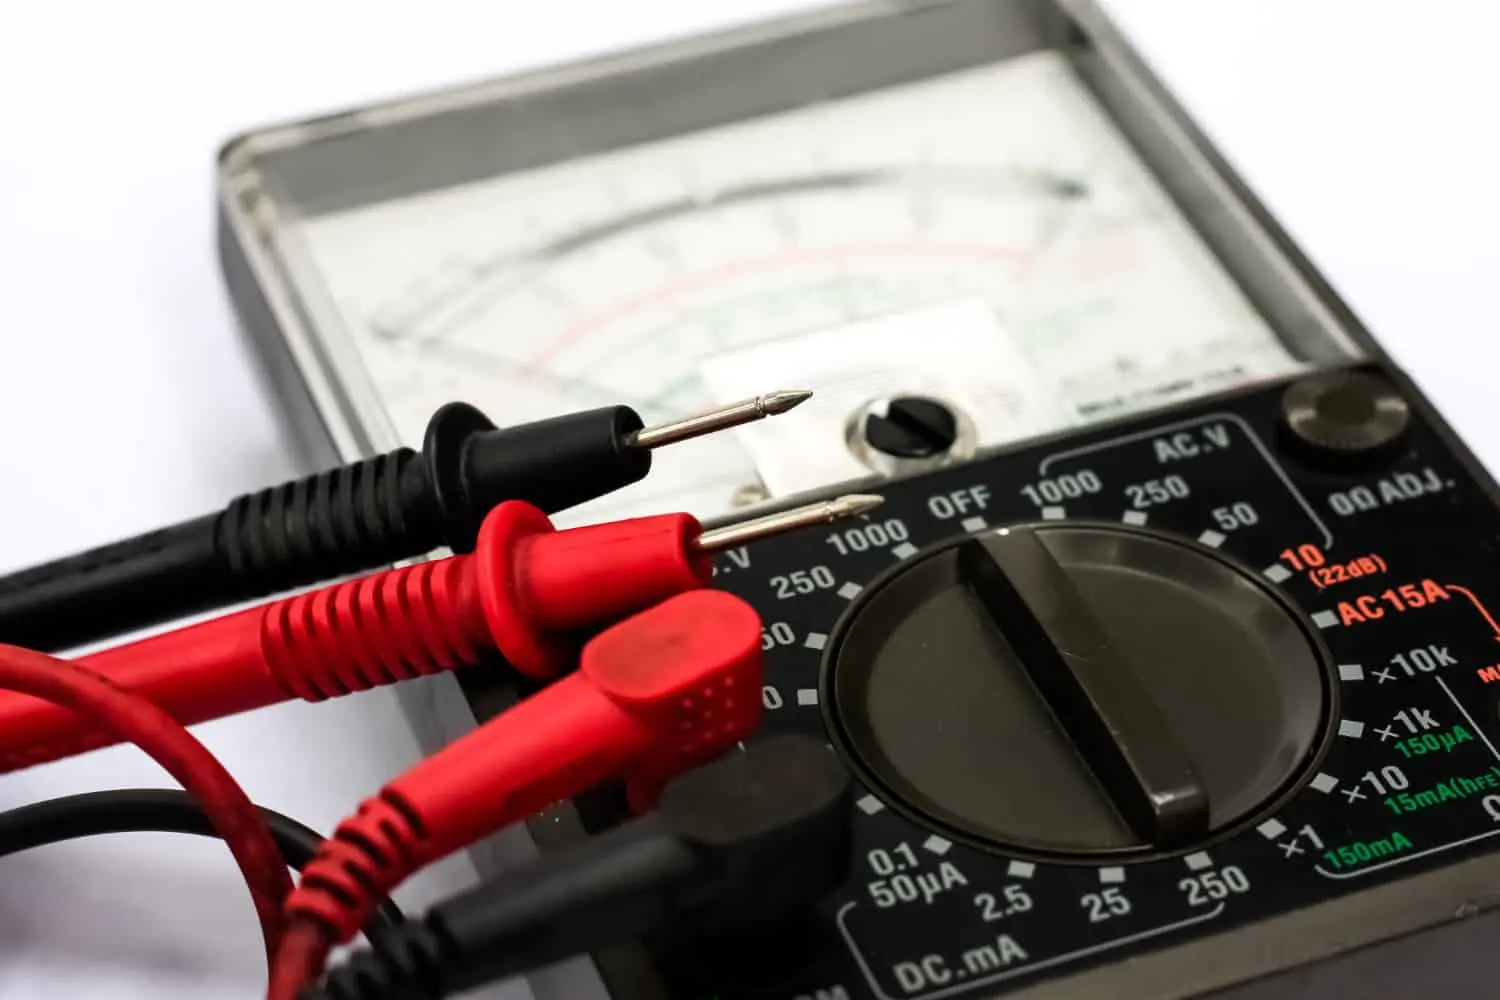
Analog multimeters are the oldest type of multimeter and are still popular with DIYers since they are relatively inexpensive and easy to use. They typically have a simple dial at the top to select the type of measurement (voltage, current, etc.) and a needle to indicate the measurement. They’re not as accurate as digital multimeters but are good enough for basic electrical testing.
-
- Digital Multimeters
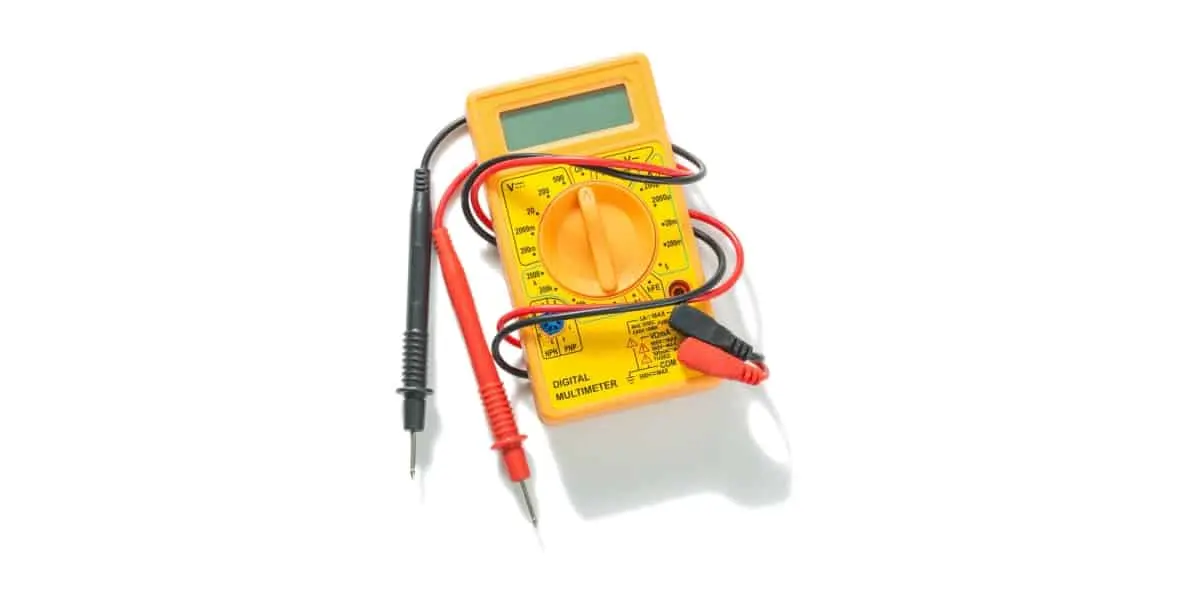
Digital multimeters are the most popular type of multimeter commonly used in professional applications. Digital multimeters are more accurate than analog ones. And they often have extra features, such as storing readings and logging data. They also tend to be more expensive than analogs. There are 3 versions of digital multimeters. They are:
-
-
- Fluke Multimeters
-
Fluke multimeters are well known for their accuracy and precision and are often used in professional applications. They are usually more expensive than other types of multimeters but come with various features that make them ideal for use in multiple situations.
-
-
- Clamp Digital Multimeters
-
Clamp digital multimeters come with a clamp attachment that allows you to measure current without accessing the wires. This makes them ideal for measuring current in tight spaces, such as inside walls or electrical equipment.
-
-
- Autoranging Multimeters
-
Autoranging multimeters are digital ones that automatically select the range of measurements you need, making them extremely easy to use. They’re great for beginners and often come with features that make them ideal for professional users, such as storing readings and logging data.
How to Use Digital Multimeter?
A multimeter is a device used to measure many different electrical properties, and it’s an invaluable tool for electricians, engineers, and DIYers alike. The three most common things a multimeter can measure are voltage, current, and resistance. Let’s take a closer look at each one.
- Voltage: Voltage is the measure of electrical potential between two points. A multimeter can measure voltage either in AC or DC. AC voltage is more common in home wiring, and DC voltage is used in more specialized applications.
- Current: Current is the measure of the rate of flow of electricity. A multimeter can measure both AC and DC. It’s essential to be aware of the amount of current flowing through a circuit, as too much current can cause damage or even fire.
- Resistance: Resistance is the measure of how easily a current can flow through a material. A multimeter can measure the resistance of most materials, and this can be used to test the integrity of a circuit.
Let’s dwell more on the step-by-step usage of a multimeter to measure voltage, current, and resistance.
How to Measure Voltage With a Multimeter?
Measuring voltage with a multimeter is a super simple process! All you need to do is select the correct mode on your multimeter, connect the probes to the circuit, and read the voltage. Make sure the multimeter is set to the voltage setting before connecting the probes.
Then, connect one probe to the positive side of the circuit and the other to the negative side. And voila – you have your voltage reading!
How to Measure Current With a Multimeter?
Measuring current with a multimeter is a relatively straightforward process. To make sure you get accurate readings, it’s important to set your multimeter to the correct setting. In this case, the “amps” or “milliamps” setting. Once you’ve done that, you’ll need to attach the multimeter’s probes to the circuit: one to the positive terminal and one to the negative.
When you’re ready, you can take your reading—just make sure you don’t touch the probes while the circuit is powered!
How to Measure Resistance With a Multimeter?
Measuring resistance with a multimeter is straightforward. First, ensure that your multimeter is set to the “resistance” mode, as this will give you the most accurate reading. Then, place the multimeter leads on the two points you want to measure, ensuring that the leads are in contact with these points. Finally, read the resistance measurement provided by the multimeter. That’s it!
What are the Significant Uses of Multimeters?
With its ability to measure voltage, current, and resistance, a multimeter is a tool that can help you troubleshoot a variety of electrical problems. These are the 5 significant uses of the multimeter and how it can help with common electrical tasks.
-
- Testing Batteries
A multimeter is an ideal tool when you need to determine if a battery is still good. It can measure the voltage of all types of batteries, including standard AA and AAA, 9-volt, and even car batteries. This can help you determine if the battery is too weak or if it needs to be replaced.
-
- Determining if an Electrical Cable is Broken
A multimeter is also an excellent tool for determining if a power cable or electrical wire is broken. All you need to do is connect it to both ends of the wire and measure the resistance. If the resistance is higher than usual, this means that there is a break in the wire.
-
- Testing a Switch
The multimeter can measure the voltage and current going through your light switch. This can help you determine if the switch is faulty or if there is an underlying electrical problem.
-
- Testing an Electrical Outlet
Multimeter to measure the voltage coming out of the electrical outlet, which can help you determine if the outlet is working correctly or if there is an underlying problem.
-
- Testing Old Incandescent Light Bulbs
Incandescent light bulbs can become faulty over time, and a multimeter is an excellent tool for testing them. By measuring the voltage and current, you can determine if the bulb is still good or needs replacing.
What are the 3 Main Parts of a Multimeter?
Let’s take a look at the 3 main parts of a multimeter.
-
- Display
The display is part of the multimeter that shows the readings. It’s typically a digital display to indicate the measurements the multimeter has taken.
-
- Selection Knob
This knob is used to select the type of measurement the multimeter takes. For example, if you want to measure voltage, you’d select the “V” setting with the knob.
-
- Ports
These are the little sockets on the multimeter where you plug in your test leads. The ports are used to connect the multimeter to whatever it’s measuring.
What is the Average Multimeter Price in the USA?
Multimeter prices can vary depending on the features, quality, and brand. Generally, a basic digital multimeter can cost anywhere from $10 to $30, while more advanced, professional-grade models can range from $50 to $300 or even more. However, prices can also be affected by factors like region and retailer.

